Hi! I was getting a little sick of how my blog looked, so I decided to 'spruce it up' a little! It ended up being a major over haul, and a lot more work than I thought it would be. Things didn't save when I wanted them to, my kids would hit buttons and delete things... it was a crazy morning.
Anyways, I hope you like it!
Let me know what you think!

Friday, October 21, 2011

Wednesday, September 28, 2011
What I did with my window.
So, my last post was all about the window I refinished. Our house is for sale, so I decided I'd keep the color the same, and decide if it would look better in a different color in our new house. Not sure where we're going yet, so I guess this is a waiting game.
Anyways, my window looked a little naked on my wall, and I knew it needed something to perk it up a little. I love banners, so I made a simple one.
Anyways, my window looked a little naked on my wall, and I knew it needed something to perk it up a little. I love banners, so I made a simple one.
 |
| I used just simple scrapbooking paper, traced letters from my computer (because I didn't have a stamp big enough), and cut them out! Oh, and I rubbed ink along the edges to give it a 'finished' look. |
 |
| This is a close up so you can see the ink on the edges. There! Now my window doesn't look quite so naked! What do you think? |
Sunday, August 14, 2011
My Window.
Wow! It's been a while since I posted! Our house is for sale, and all my crafty/creative stuff is packed away in storage so to not make our house seem too crowded.
Although I haven't been posting, I have been following some great blogs. One of my favorites is Cozy.Cottage.Cute. I absolutely LOVE everything that girl does. She has a fondness for old windows, too. She put up this great tutorial for how to finish a window. She put mirrors in hers, which is a good idea too, but I didn't want mine to be too heavy. Check her blog out.
A few months ago, I found a great old window at a garage sale for about $5.00. I've always loved the look of an old window finished just right, but have never loved the price that comes along with them. $100? For a crusty old window? I just couldn't justify it, no matter how great it looked in my home. After Sarah put up her tutorial, I knew just what I would do.
The $5.00 window I found looked like this.


Although I haven't been posting, I have been following some great blogs. One of my favorites is Cozy.Cottage.Cute. I absolutely LOVE everything that girl does. She has a fondness for old windows, too. She put up this great tutorial for how to finish a window. She put mirrors in hers, which is a good idea too, but I didn't want mine to be too heavy. Check her blog out.
A few months ago, I found a great old window at a garage sale for about $5.00. I've always loved the look of an old window finished just right, but have never loved the price that comes along with them. $100? For a crusty old window? I just couldn't justify it, no matter how great it looked in my home. After Sarah put up her tutorial, I knew just what I would do.
The $5.00 window I found looked like this.

It was in (mostly) great shape. The glass had little paint splatters on it, and no matter how hard I tried, I couldn't get them off, or get all the grime off the glass. I decided the glass needed to come out. As I was taking the glass out, one of the inside window bar things (yes, that's a technical term) fell out. I used some 'No More Nails' to hold that in place, and, voila, it was good to go!
Next, I primed the whole window with 'Exterminator'.

I didn't sand before I primed, because I wanted the window to have lots of texture when I was finished.
After priming the window, I im-patiently waited for it to dry. Next came painting. I chose the cheapest white I could find at Benjamin Moore.

I waited... again... for paint to dry.
When it was dry, I took some sandpaper and sanded the crap out of it. I did the edges first, just to give it a natural weathered look. Then, I sanded the flat pieces lightly, just so the wood would show through a little.
Final result didn't show up as well as I'd hoped in pictures, but here's a couple shots. I think I'm in love!


My dear husband is not a huge fan of the whole 'paint something white and sand it all off to make it look old' thing, and he thinks I should re-paint this window dark, DARK navy blue or charcoal and try it again. What do you all think?
Tuesday, April 26, 2011
James' Farm Cake
Wow! Can hardly believe it's been so long since I posted something on here!
I finished the birthday cake for my son's 4th birthday party today. It's not his birthday til tomorrow, but I just wanted it to be done. He wanted a farm cake with "a barn and with cows and with sheep and with pigs", and this was the only way I could think of to do that for him. I didn't take pictures as I was making it, but here's the finished product. Oh, and since I HATE red food dye, I used strawberry jam to make the pink. Enjoy!

I finished the birthday cake for my son's 4th birthday party today. It's not his birthday til tomorrow, but I just wanted it to be done. He wanted a farm cake with "a barn and with cows and with sheep and with pigs", and this was the only way I could think of to do that for him. I didn't take pictures as I was making it, but here's the finished product. Oh, and since I HATE red food dye, I used strawberry jam to make the pink. Enjoy!
 |
| These are the cows... (mommy ones and baby ones, I've been informed) |
 |
| These are the pigs... (again, mommy and baby ones) |
 |
| And these are the sheep... (you guessed it) |
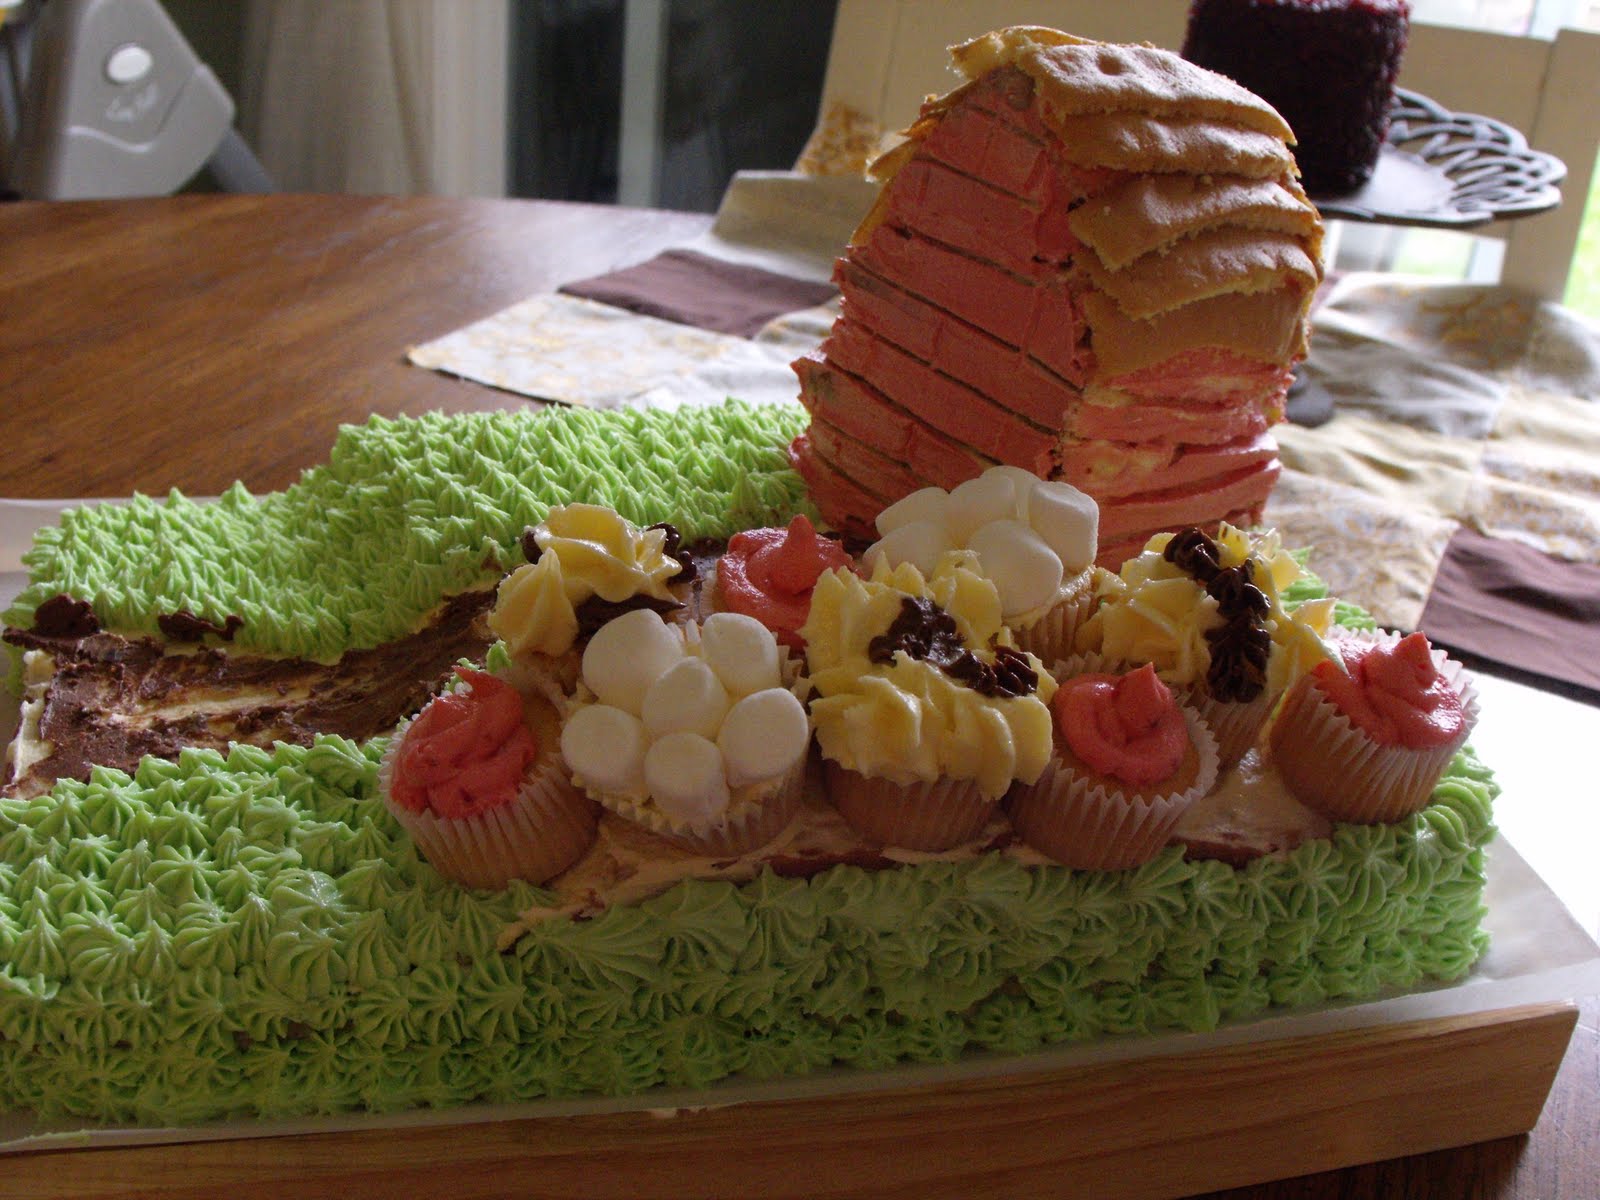 |
| And this is the 'almost' finished product. I just need to add a little fence (pretzel sticks), and we should be good ! I hope he likes it! |
Sunday, April 3, 2011
A Picture a Day for 7 Days... Day 3.
I love these pictures. They were both taken a few days ago. This is my little boy, Tyler. I just love the character in his little face! We go for lots of walks by the river here, and both my boys just love being outside. Tomorrow's pics will be of my bigger boy... I'm not playing favorites, I promise!


Thanks again for checking out my pictures!
Saturday, April 2, 2011
A Picture a Day for 7 Days... Day 2.
One of the things I love most about living in British Columbia, is our GORGEOUS mountains. This one is Mount Cheam. We get to see this beauty every day!


Thank you for popping in to take a look! Be sure to check out the other blogs participating in this photo 'challenge'.
Dawna from That Country Place
Mamamonki from Adventures of Being a Mom
B&B's Mama from B&B's Nest
Robyn from Out of Ours
And, of course,
Friday, April 1, 2011
A Picture a Day for 7 Days... Day 1.
I got this idea from one of the blogs I follow (Cozy Cottage Cute), and thought it would be easy enough to do myself. I'm kind of in the middle of lots of little crafty things right now, but nothing finished to post.
So, here goes! My first photo, of 7. This was taken yesterday while we were walking by the river. The blue herons are nesting, and I just thought it looked so cool!

So, here goes! My first photo, of 7. This was taken yesterday while we were walking by the river. The blue herons are nesting, and I just thought it looked so cool!

Yes, those are all heron nests. Another month and all the baby herons will be hatching, then they'll be gone until next year.
Subscribe to:
Posts (Atom)