So, apparently I'm terrible at blogging. Wow! 2012 was my last post? It's been 3 years! My babies are now 5 and 8 (I KNOW! When did that happen), we are happily settled into the house, and life has gone on.
We are making a big change this year, however. We have decided that we are going to home school the boys in September. James will be doing grade 3, and Tyler will be doing kindergarten. Things are going to be a little different around here, but I am hoping that maybe, by venting into a blog, things will run smoothly. :)
I have a couple projects I have done since my last post. Maybe we should turn this blog into a once a week posting, so I don't get too carried away.
Up next week, then, will be the pile of lumber I turned into bunk beds for my boys.
Cheers!

Monday, July 13, 2015

Monday, November 12, 2012
Living Room Wall
Remember the middle of this post, where I showed pictures of my living room? Well, I am happy to say that it is the only completely finished room in our house. All the pictures are hung, furniture is where it should be, and the walls are even painted!
Do you need a refresher so you can remember what it looked like before?


Do you need a refresher so you can remember what it looked like before?

The walls were a yellow that clashed with the floor...

And the 'focal wall' looked horrible with the fireplace and the yellow on the other walls.
Are you ready to see it now?
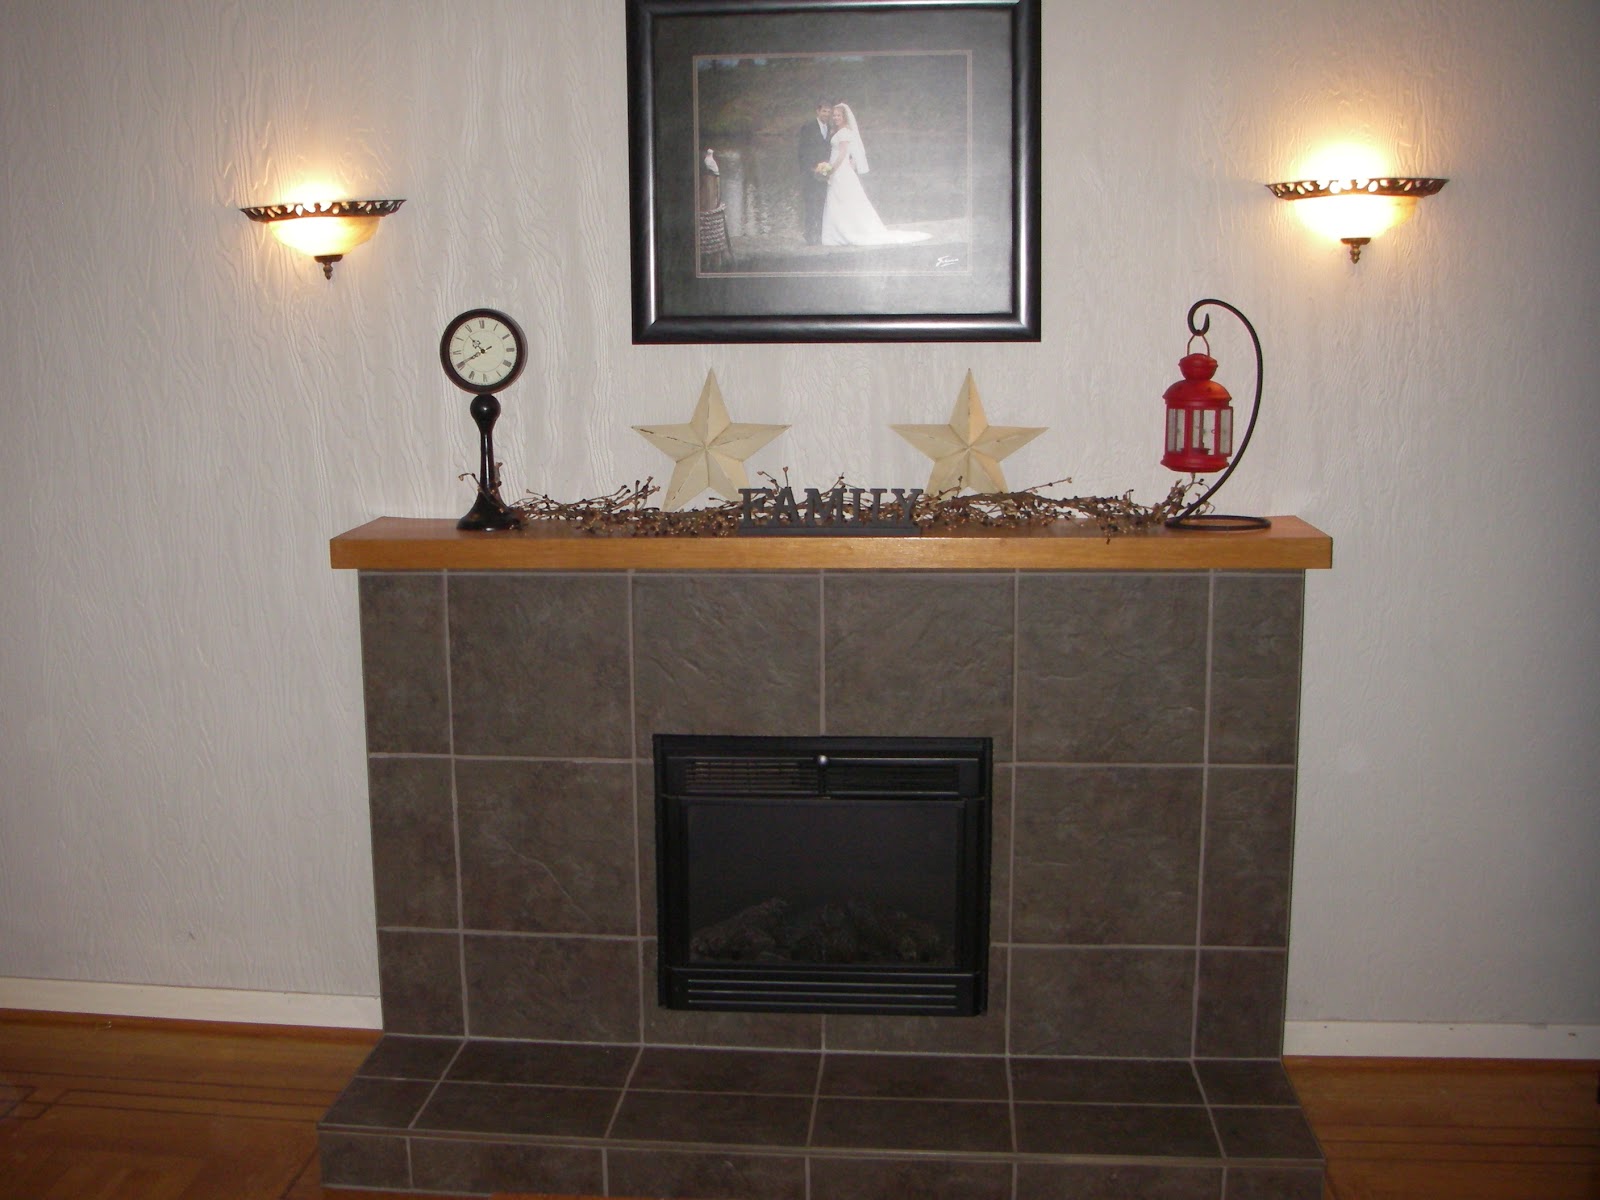
What do you think? Do you love the light grey as much as I do?

This is the picture wall above the love seat. I just LOVE how it turned out.
All these frames were just sitting around my house waiting for spray paint. It honestly took no longer than 5 minutes, and I had all matching frames!

I found this key at a little store in our area quite a few years ago. I LOVED it, but I didn't ever know what to do with it. A little twine, a little frame, and you've got something cute to hang on your wall!

Our family picture, taken by Urban Fig Photography. I love it so much! It's HUGE, and I'm thankful I got it printed so big, because I had a big empty space that needed something. Perfect!
Thanks for dropping by! Don't be shy! Leave a note to say you were here. I'd love to hear what you think!
Thursday, November 8, 2012
Candy Jar
My cousin, Tara, and I went craft fair shopping in our town last week. I have to say that I was NOT impressed at all with what the craft fair had to offer, but that's not what this is about. There was a little room off the back, behind all the other tables, and it was FULL of antiques and fun little things. I found an adorable little globe, and a large jar with a lid that would be PERFECT as a treat jar. Don't you think?


It's quite big... I'd say 6"x6" for sure. Mmmm... salt water toffee...
Here I go, on and on and on about Tara, and none of you even know who she is. WELL. Here. Go check her out! She makes THE most beautiful cards and paper crafts. Anyways, a couple weeks ago, we bought a Cricut machine together. With this, we can cut out shapes, letters... you name it. I decided to throw some vinyl on the machine and see if I could cut out some cute letters for my jar.

I've gotta say, I'm pretty happy with how they turned out! I simply peeled off the backing, and they stuck right to the glass! No mess, no problem!
Thanks for checking it out!
Wednesday, November 7, 2012
A lamp project...
Wow! SO much has been going on around here! We took the huge tree out of the front yard, planted a bunch of stuff in the back yard, finished the living room... blah blah blah... but I haven't posted any of it!
The weather's been a bit miserable around here the last couple weeks, with lots of rain. Since my hubby's been on night shift and it gets dark so early, that leaves lots of time for me to 'get my craft on'!
Up first, a lamp that was given to us by my parents. I didn't manage to get a before picture, but just believe me when I say they were horrible. They were a brown that was really bumpy... almost like it was trying to look rusty. There was a plexi glass piece in the middle that was supposed to look like a crackled finish, but the paper that had the 'crackle' on it had come loose from the inside and was all bunched up in the bottom. The shade was a sorry shade of tan/beige/cream. I think I explained it how it was.
Anyways, I've fallen madly in love with burlap lately, and figured it would make a nice touch to my living room. I cut out a piece and went to town on it, sewing it BY HAND to the existing shade. Let me just add a note here to say that sewing through a lampshade is not an easy feat. My fingertips tingled for DAYS! Here's a picture of the shade...


The weather's been a bit miserable around here the last couple weeks, with lots of rain. Since my hubby's been on night shift and it gets dark so early, that leaves lots of time for me to 'get my craft on'!
Up first, a lamp that was given to us by my parents. I didn't manage to get a before picture, but just believe me when I say they were horrible. They were a brown that was really bumpy... almost like it was trying to look rusty. There was a plexi glass piece in the middle that was supposed to look like a crackled finish, but the paper that had the 'crackle' on it had come loose from the inside and was all bunched up in the bottom. The shade was a sorry shade of tan/beige/cream. I think I explained it how it was.
Anyways, I've fallen madly in love with burlap lately, and figured it would make a nice touch to my living room. I cut out a piece and went to town on it, sewing it BY HAND to the existing shade. Let me just add a note here to say that sewing through a lampshade is not an easy feat. My fingertips tingled for DAYS! Here's a picture of the shade...

I cut the burlap, and didn't know how I should finish off the end without it looking 'goofy'. I figured adding a button and sewing the edges would give it a little character. I LOVE how it turned out!
Up next is a picture of the base. I simply took it outside, and spray painted it all black. This is only one coat, and it covered awesome.

I had the berry garland from some candle thing in the old house, and it fit perfectly on the base and added a pop of color. The star garland I found tucked in a box down stairs. Nothing quite like using what you have!
Here's a picture of the completed lamp.

I just love how it is so unique!
Thursday, June 7, 2012
Pre-School Teacher Appreciation Gift
My oldest son just graduated from pre-school. *sniff* When/how did he get old enough for that? I can't believe he's such a big... kid already. I look at him, and he's shot up (probably) more than an inch in the last couple months. He's lost that 'little boy' look, and he's actually a kid now. It's so exciting that he'll be going to kindergarten in just a few short months, but I keep anxiously looking for the pause button to keep him little for a bit.
Want to see some pictures from his graduation night?
So, what do you get the teacher that taught your son so many new things? I thought of flowers, but flowers die, and I wanted something unique. I thought of some kind of nick-nacky thing, but she probably already has tonnes of those. So, I came up with this.

I got a rough idea from a Close to my Heart catalog (if you're interested in more info, check out my cousin's blog... she sells their products and makes BEAUTIFUL stuff...Paper Bliss Crafting. Her name's Tara... she's awesome.)
Anyways, I tried thinking of something that didn't sound too cheesy to put on the side of the can. Finally my friend came up with this saying, and it totally works! My dear husband thinks it's cheesy, but he couldn't come up with anything better. :)
Inside are graham crackers, marshmallows, and Caramilk bars... everything you need to make s'mores!
Thanks for checking it out!
Want to see some pictures from his graduation night?
 |
| Doesn't he look handsome? |
 |
| All lined up and ready to sing to the parents/grandparents. |

Anyways, I tried thinking of something that didn't sound too cheesy to put on the side of the can. Finally my friend came up with this saying, and it totally works! My dear husband thinks it's cheesy, but he couldn't come up with anything better. :)
Inside are graham crackers, marshmallows, and Caramilk bars... everything you need to make s'mores!
Thanks for checking it out!
Tuesday, June 5, 2012
Ready For The Rest Of The Tour?
Hello, again! Welcome to the rest of my home tour! Last week I showed you the outside and upstairs of my house. Today, you'll get to see my basement. Are you ready?
 |
| Come on down. Kinda looks like a creepy, damp, smelly, spider infested dungeon, doesn't it? I can assure you, it's not. Keep walkin', you're fine! |
 |
| Aaahhh. See? What did I tell you. This is the bottom of the stairs looking into the (huge) playroom. Yes, the carpet got cleaned and looks MUCH better. |
 |
| Here's another look. The door at the back is a bathroom. |
 |
| This is Tyler in the bathroom. The toilet is up those steps. James thinks this is just great because he says it's like a king's throne! |
 |
| So, if you want to turn around and head back towards the stairs, we'll continue our tour. Through that doorway, please. |
 |
| This is the room that has become my office. The desk is against that wall with no drywall on it that plans to get covered in the next little while. I love that it's right off the play room, because the kids can still chat with me, but I have my own little space. On the other side of that unfinished wall is our little 'guest room' area. |
 |
| This is one of the down stairs bedrooms that has become our storage room. We don't need this bedroom as there are plenty upstairs for us. |
Next tour will be of the yard.
Thanks for checking my house out!
Friday, June 1, 2012
It's Been 5 Months?
I can't believe it's been 5 months since my last post! Anyways, a lot has happened in those 5 months. We sold our townhouse and bought a 'real' house.
We're SUPER excited to have our own 'real' house, but this one does need quite a bit of work. It's live-able how it is, but we love getting our hands dirty and fixing things up.
It's SO nice to have a yard to mow and room for the kids to play. We plan to paint the exterior this summer... so no more pink!
We're SUPER excited to have our own 'real' house, but this one does need quite a bit of work. It's live-able how it is, but we love getting our hands dirty and fixing things up.
 |
| This is the front of our new home... |
 |
| ... and this is the back. |
Want to come on a quick tour of the rest of our house?
Well, I hope you enjoyed the little tour of our new home. Next up is the basement, so stay tuned!
 |
| Here's my wonderful father in law putting together our bed. This is the master bedroom. |
 |
| This is Tyler's room. It's a bit of a weird shape because it has to accommodate the stairs, but it works great for him! |
 |
| This is the main bathroom. And yes, there's a toilet... it's behind that wall you see on the left at the back of the tub. |
 |
| This is the living room before. It was a really strange yellow that looked HORRIBLE with the floors. There's also a great fireplace in this room, and the wall behind that was a weird brown. |
 |
| This is the living room after. Not a great picture, but you get the general idea. We painted (and by we, I actually mean my dear hubby helped me...) it a nice light, airy grey. It looks AWESOME with the hardwood. |
 |
| This is James' room before. There were TONNES of holes in the walls, so they all got filled. |
 |
| James even got to help me paint! I'm so jealous of his room. He has this GREAT window that looks out over the back yard. |
 |
| Now his room is a really cheery blue. A perfect 'boys' room! |
Well, I hope you enjoyed the little tour of our new home. Next up is the basement, so stay tuned!
Subscribe to:
Posts (Atom)